Printer setup
Star mC-Print2
- connect your printer to the network
- print a self test by pressing the
POWER ONand theFEEDbutton - on the printout you will find an IP address for your local network
- log in and go to the
CloudPRNTtab Printer setup
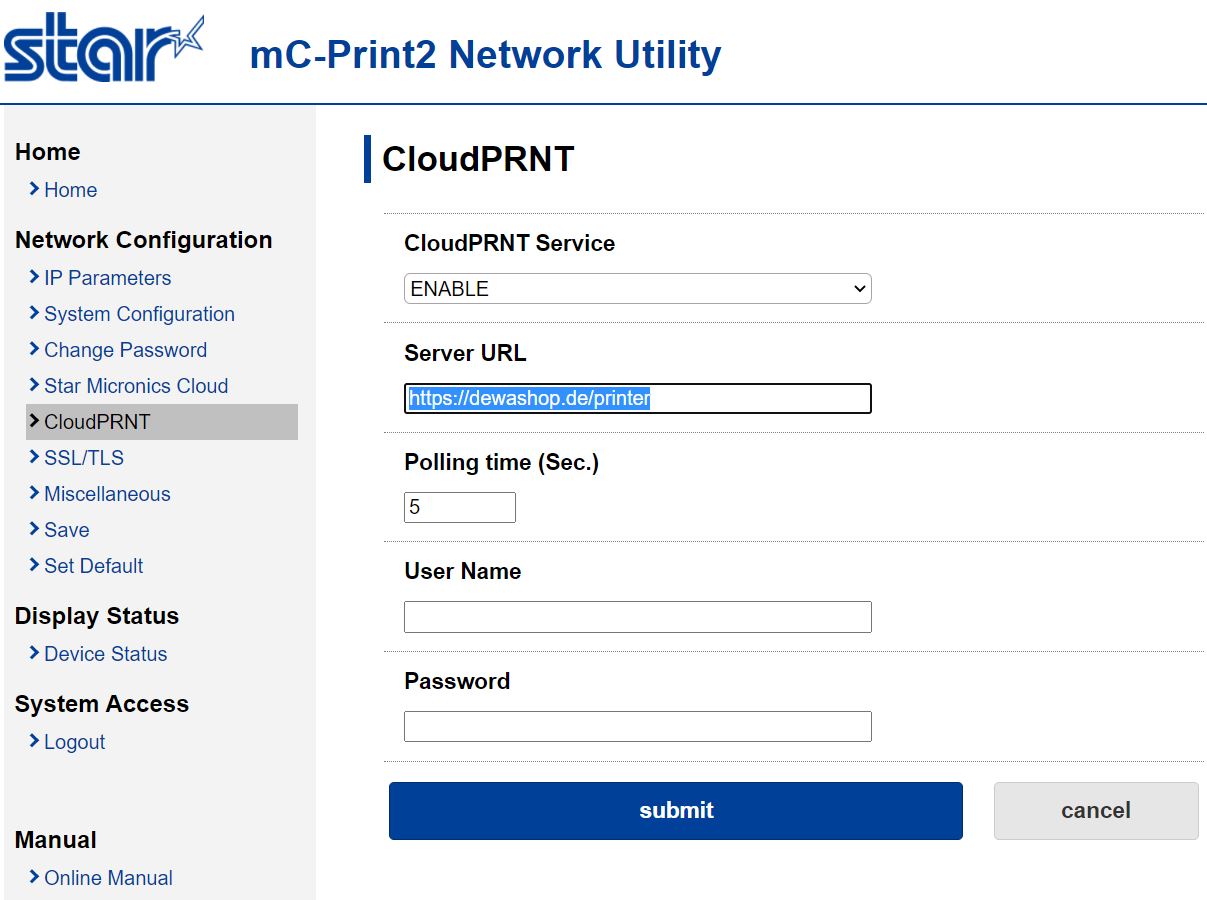
- enter the URL of your store +
/printer- e.g.https://dewashop.de/printer. - go to the tab
Homeand copy the MAC address of your printer

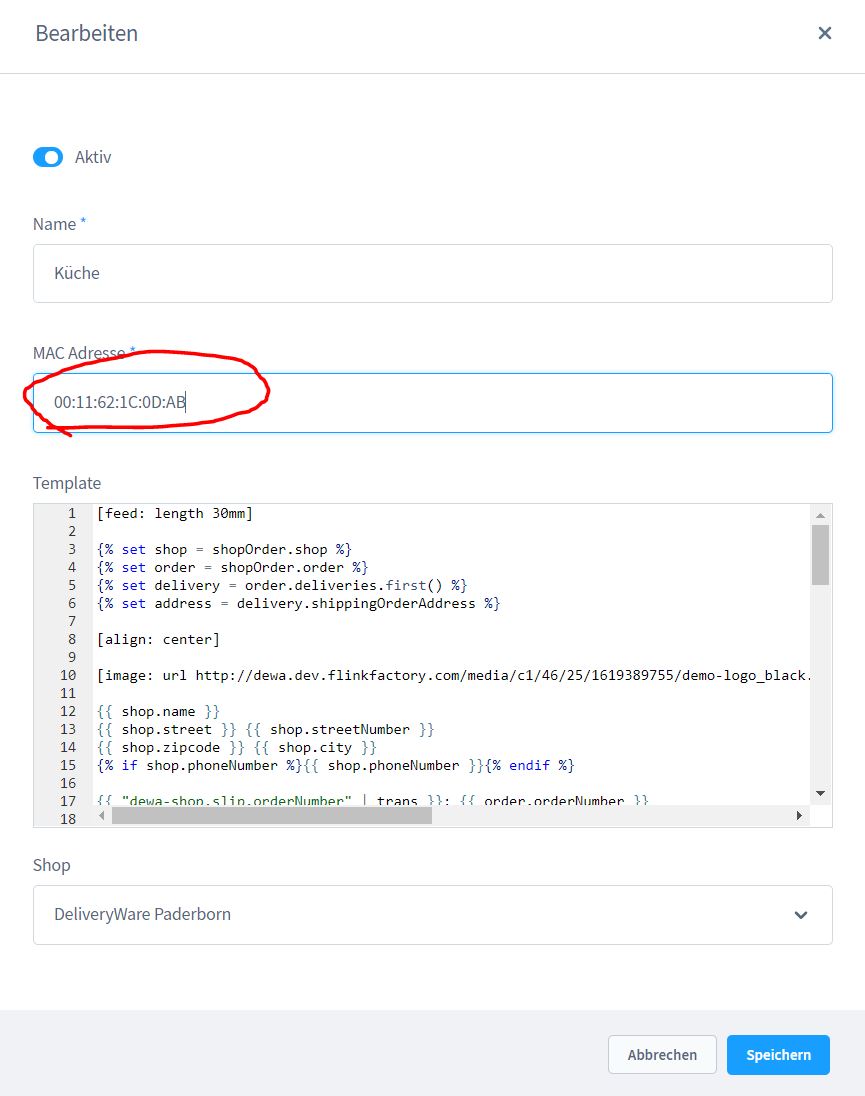
- now log in to the admin area of your store.
- open the store settings and scroll to the bottom of the page
-
create a printer and copy the MAC address
-
enter the URL of your store +
/printer- e.g.https://dewashop.de/printer.
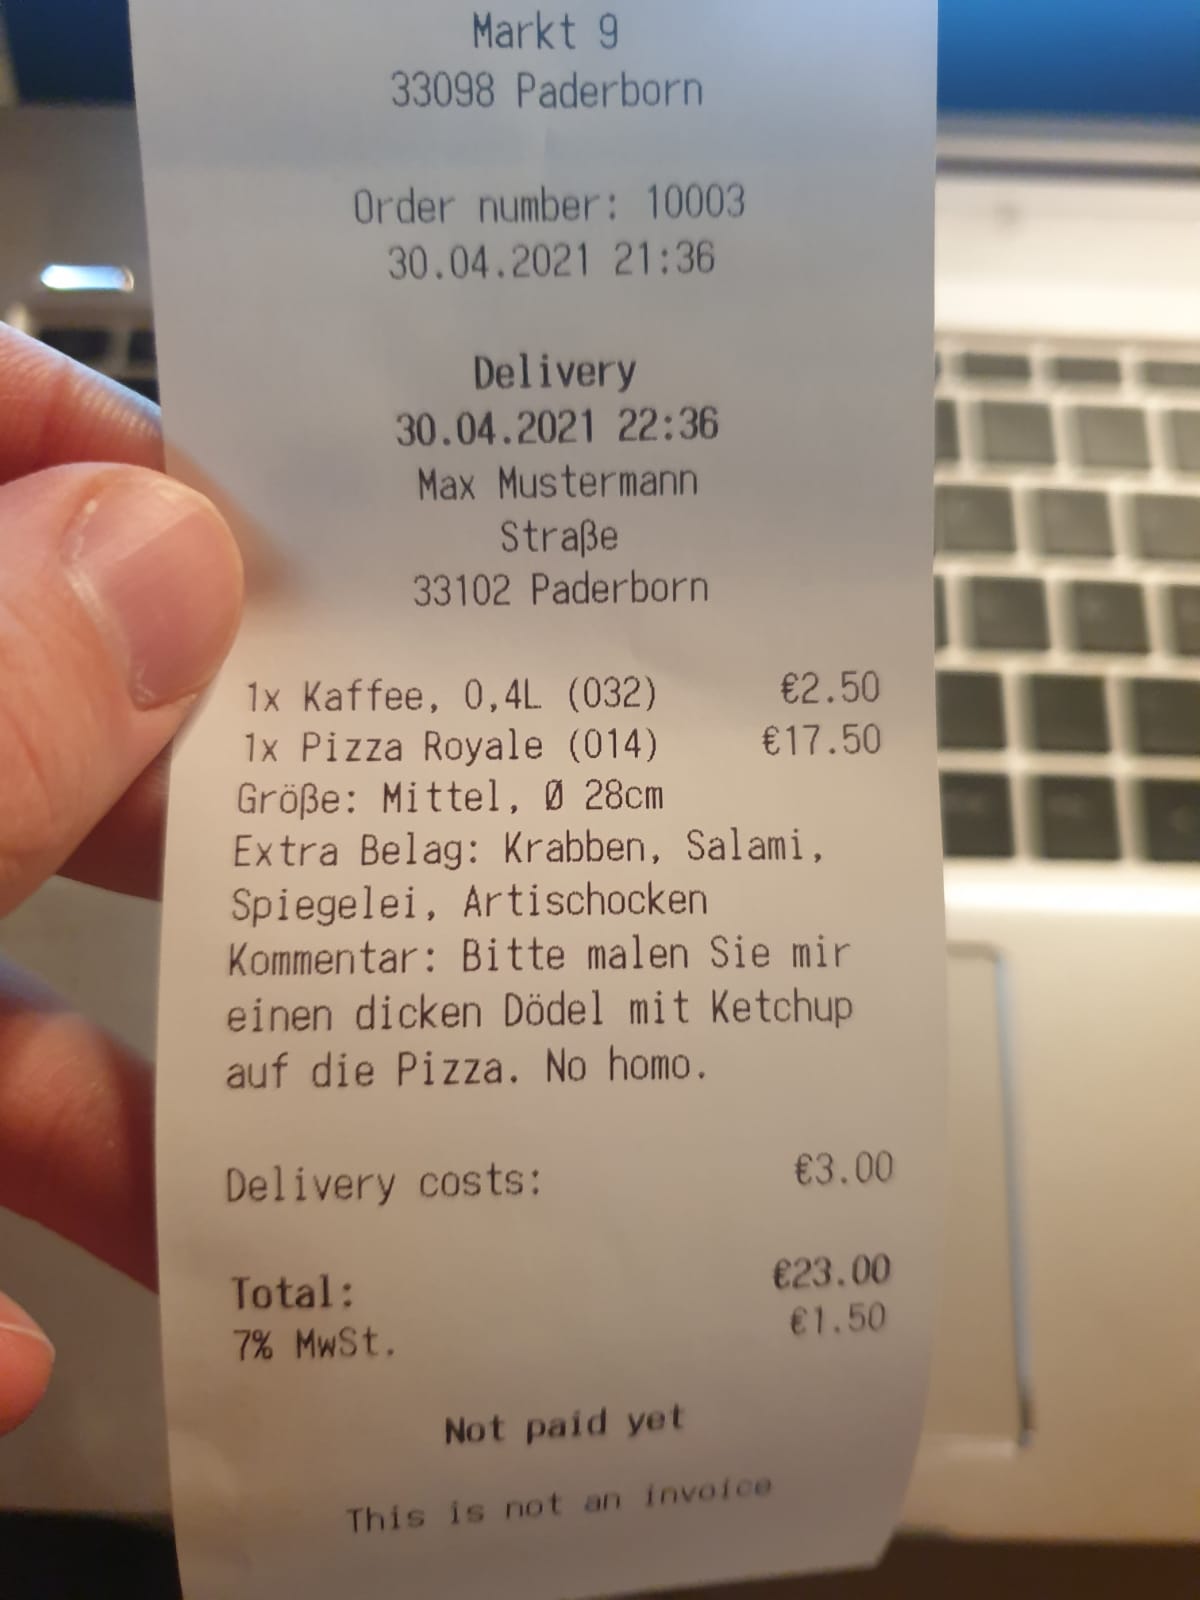
All right, the setup has been completed.
Now make a test order, go to the store dashboard and when accepting it, select the select the freshly set up receipt printer.
If by chance you have not forgotten to put a paper roll into the printer, you should now have this (or a similar) result!
By the way, there's also an official video for the printer. It is for our competitor
competitor WooCommerce but a look into it might be helpful for you!
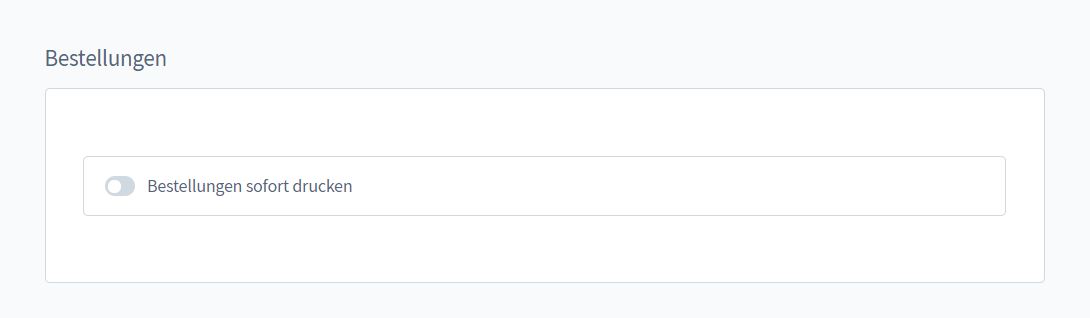
In the app settings, you can also trigger the creation of receipts for each order - this is worthwhile e.g. if you receive orders in the evening for the next day (baker, butcher, etc.)
/admin#/sw/extension/config/DewaShop